本記事の内容
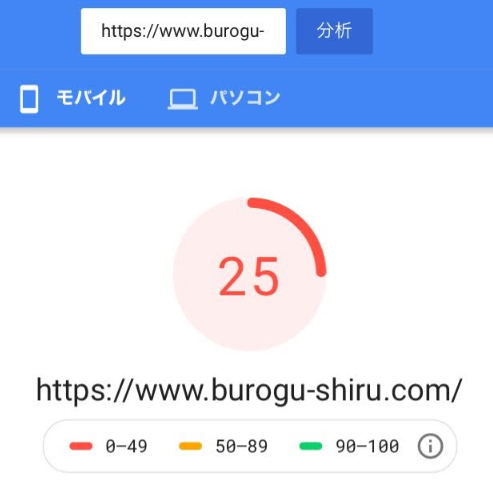
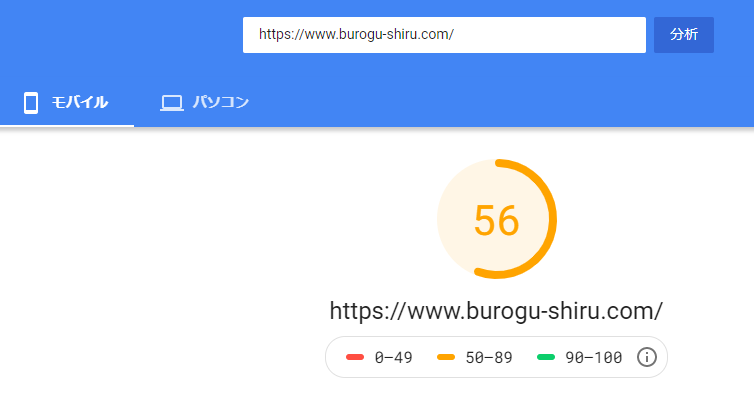
- モバイルスコアが30アップした方法を3つご紹介
モバイルスコアをアップした3つの方法
- functions.phpへ追記(10分)
- .htaccessへ追記(10分)
- プラグインで画像WebPへ変換(画像量によりますが、多い場合は変換に2時間はかかります)
タブで切り替え可能!
私の作業条件は下記となっております。
作業条件
- FTPソフト『FileZilla FTP Client』を使用
- テーマ『アフィンガー5』
- サーバー『エックスサーバー』
functions.phpへ追記
- Google Fontsを適用させない設定
- スライダーのCSSを適用させない設定
- スライダーのJavaScriptを適用させない設定
注意ポイント
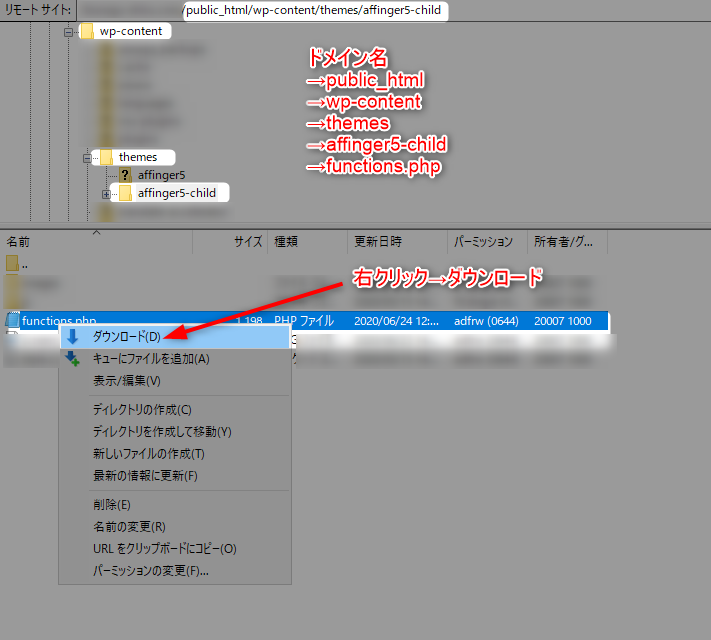
functions.phpの場所
ポイント
step
1右クリック→ダウンロード
ダウンロード先は任意で良いです。(わかりやすい場所)
functions.phpへ追記
注意ポイント
functions.phpのコピーファイルを作成しておく!
ポイント
step
2functions.phpの一番下に追記
// Google Fontsを適用させない設定
function deregister_styles_google_fonts() {
  wp_deregister_style( 'fonts-googleapis-roundedmplus1c' );
  wp_register_style( 'fonts-googleapis-roundedmplus1c', '' );
  wp_deregister_style( 'fonts-googleapis-notosansjp' );
  wp_register_style( 'fonts-googleapis-notosansjp', '' );
  wp_deregister_style( 'fonts-googleapis-lato700' );
  wp_register_style( 'fonts-googleapis-lato700', '' );
  wp_deregister_style( 'fonts-googleapis-montserrat' );
  wp_register_style( 'fonts-googleapis-montserrat', '' );
}
add_action( 'wp_print_styles', 'deregister_styles_google_fonts' );
// スライダーのCSSを適用させない設定
function deregister_styles_slick() {
  wp_deregister_style( 'slick' );
  wp_register_style( 'slick', '' );
  wp_deregister_style( 'slick-theme' );
  wp_register_style( 'slick-theme', '' );
}
add_action( 'wp_print_styles', 'deregister_styles_slick' );
// スライダーのJavaScriptを適用させない設定
function deregister_script_slick() {
  wp_deregister_script( 'slick' );
  wp_register_script( 'slick', '' );
}
add_action( 'wp_print_scripts', 'deregister_script_slick' );
functions.phpをアップロード
step
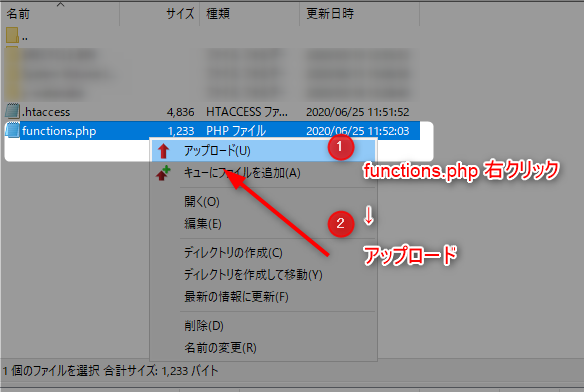
3functions.phpへ追記ができたら、元の場所にアップロード
元の場所とは?
ポイント
ポイント
.htaccessへ追記
- キャッシュを1ヶ月保持する設定
- Gzip圧縮する設定
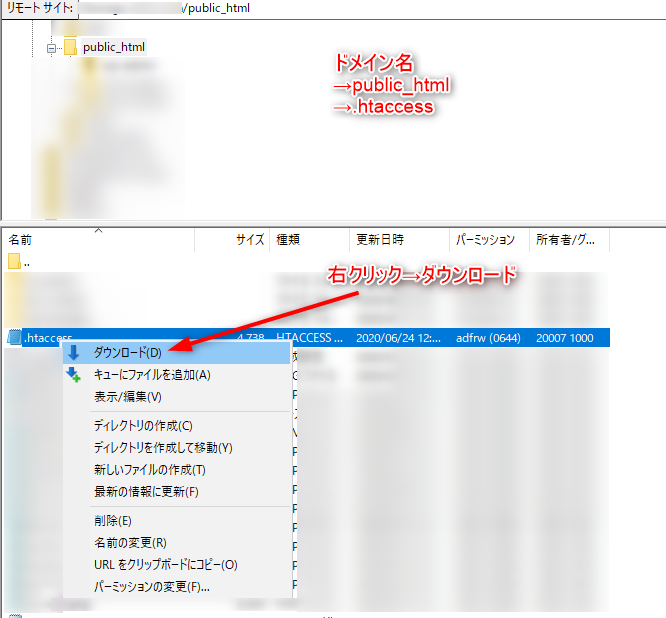
.htaccessの場所
ポイント
step
1右クリックでダウンロード
ダウンロード先は任意で良いです。(わかりやすい場所)
.htaccessへ追記
元のファイルをコピーして残しておきましょう。
注意ポイント
ダウンロードしたら、最初に.htaccessをコピーしておきます。
step
2.htaccessの一番下に追記
# キャッシュを1ヶ月保持する設定
<ifModule mod_expires.c>
ExpiresActive On
ExpiresByType image/gif "access plus 1 months"
ExpiresByType image/png "access plus 1 months"
ExpiresByType image/jpg "access plus 1 months"
ExpiresByType image/jpeg "access plus 1 months"
ExpiresByType image/x-icon "access plus 6 months"
ExpiresByType text/html "access plus 1 days"
ExpiresByType text/css "access plus 1 days"
ExpiresByType text/javascript "access plus 1 months"
ExpiresByType application/javascript "access plus 1 months"
ExpiresByType application/x-javascript "access plus 1 months"
</IfModule>
# Gzip圧縮をする設定
SetOutputFilter DEFLATE
# 画像は再圧縮しない
SetEnvIfNoCase Request_URI \.(?:gif|jpe?g|png|ico)$ no-gzip dont-vary
Header append Vary Accept-Encoding env=!dont-vary
# 各MIME Typeを圧縮対象にする
AddOutputFilterByType DEFLATE text/html
AddOutputFilterByType DEFLATE text/css
AddOutputFilterByType DEFLATE application/xml
AddOutputFilterByType DEFLATE application/xhtml+xml
AddOutputFilterByType DEFLATE application/rss+xml
AddOutputFilterByType DEFLATE application/atom_xml
AddOutputFilterByType DEFLATE application/javascript
AddOutputFilterByType DEFLATE application/x-javascript
AddOutputFilterByType DEFLATE application/x-httpd-php
AddOutputFilterByType DEFLATE application/x-font-ttf
AddOutputFilterByType DEFLATE application/x-font-woff
AddOutputFilterByType DEFLATE application/x-font-opentype
AddOutputFilterByType DEFLATE application/vnd.ms-fontobject
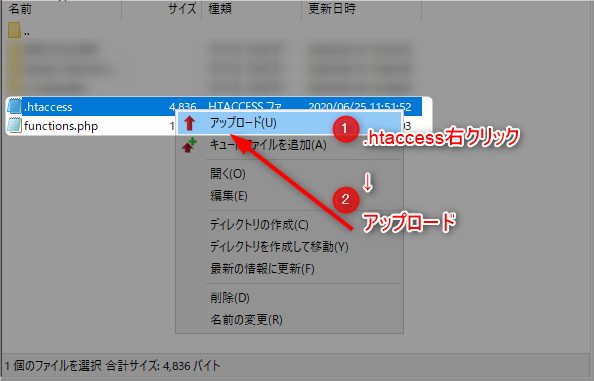
.htaccessをアップロード
step
3.htaccessへ追記ができたら、元の場所にアップロードします。
元の場所とは?
ポイント
ポイント
WebPへ画像を変換
step
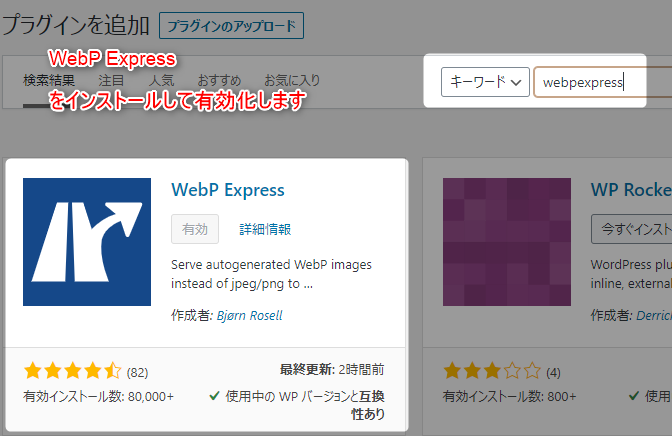
1『WebP Express』をインストール後に有効化
step
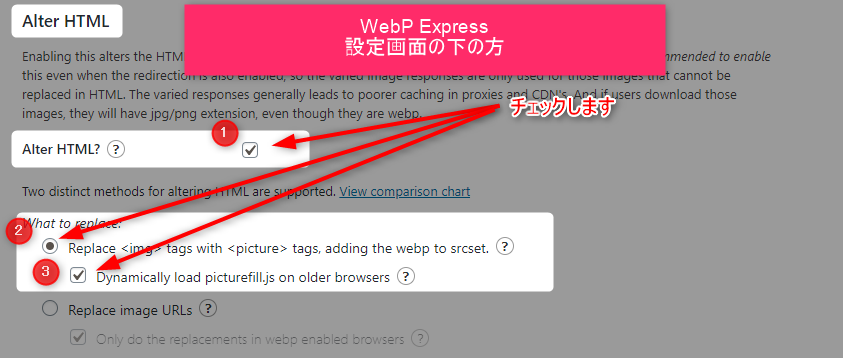
2設定タブから『WebP Express』の設定を開く
- 『Alter HTML』にチェック
- 『Replace <img> tags with <picture> tags, adding the webp to srcset』または『Replace image URLs』にチェック
step
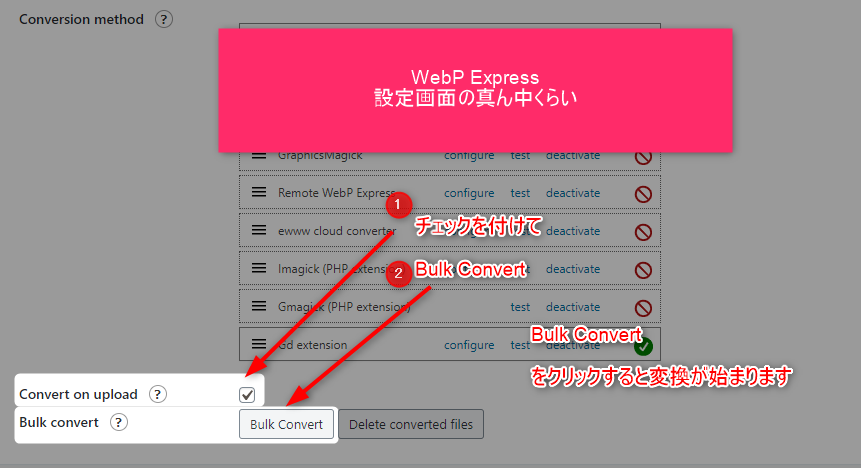
3『Convert on upload』にチェックして、『Bulk Convert』をクリックすると変換が始まる
まとめ
ご紹介した通り、FTP転送を多用しています。
しかし、実際に作業をしてみるとそ~んなに難しくはありません。
functions.phpや.htaccessへの追記も1,2回作業すれば慣れます。
